MH_Courtney
Reefing newb
We decided that we needed more space that just a few frag racks in our 265 display. We really like the 2'x4'x8" rimless tanks so we decided to set up a system based off that size tank. We debated about purchasing the glass tanks from Glasscages or building our own acrylic tanks. We decided after crunching the numbers that it would be better to go with the glass tanks instead of building the acrylic ones. Building the tanks would have definitely been a fun project and I am sure we will be building some acrylic tanks in the future.
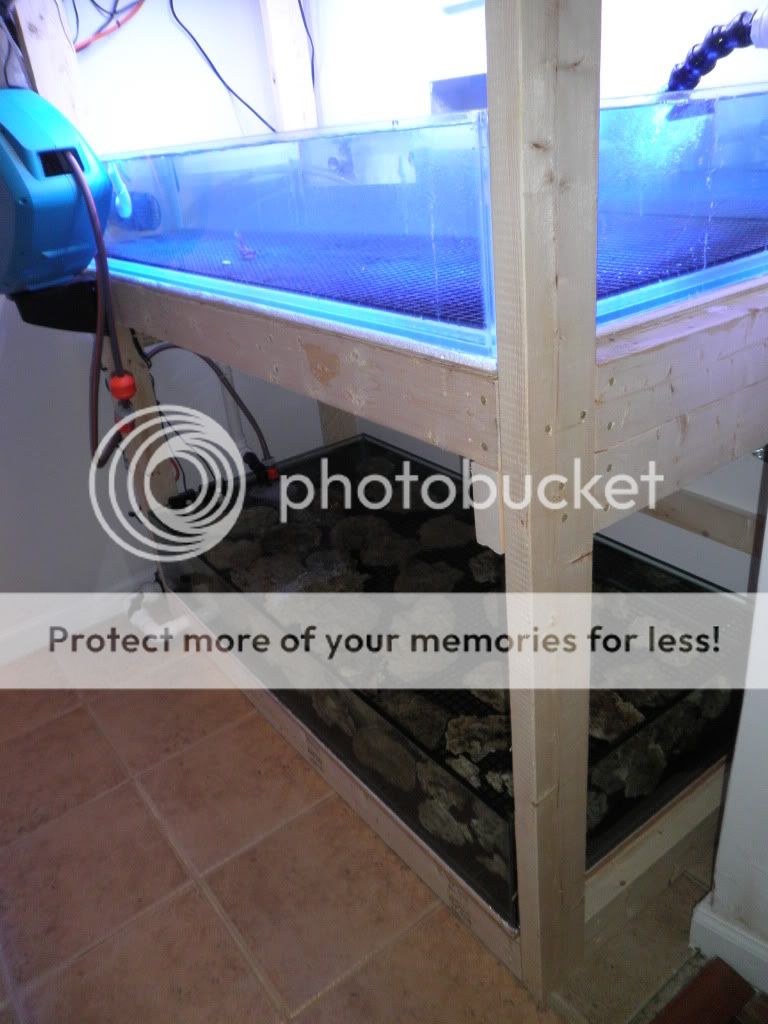
We had a very small space to work with where we wanted to fit the frag tanks so we decided to go much more unconventional and build vertically. Instead of fitting 1 tank in the space we managed to squeeze in 3. The tanks are stacked on top of each other and are all plumbed together and are sumpless. There is no skimmer or any filtration on the tanks, we will be relying on daily water changes to maintain the water quality. 10 gallon water changes a day should be enough to keep the water parameters stable and weekly siphoning for any detritus. Time will tell if the system will work like this or if it will need to tweaked some. At the moment the bottom tank has about 75 lbs of live rock in it that we got in a trade so that should also help with the filtration for the time being. We do not plan on putting any fish in this system so I think just the water changes will be enough.
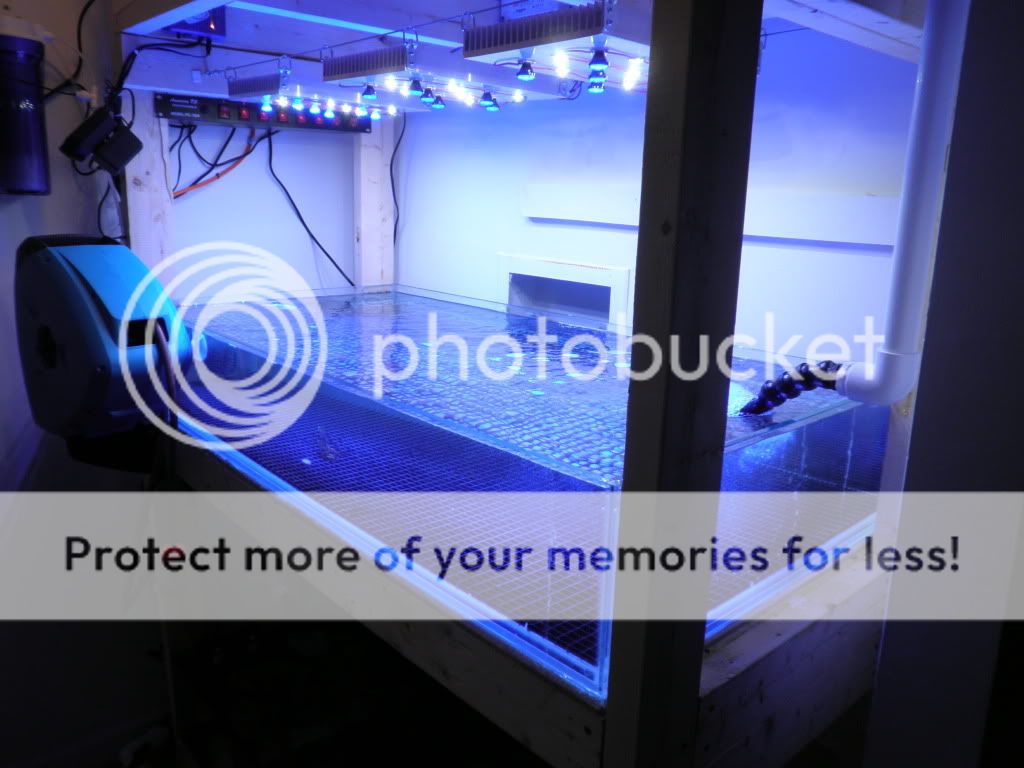
Currently the middle tank is the only one that is completely setup. It has a Vortech MP20 on the opposite side from the return, black eggcrate for the frags and 3 12"x8" heatsinks with 12 LEDs each for a total of 36: 18 Cree Blues and 18 Rebel Luxeon whites. These LEDs are not dimmable like our display but are the same LEDs. We currently have 60 degree optics on just the blues.
We do a 10 gallon water change on our 265 gallon everyday and now instead of putting that water into the toilet I will be putting that water into this system and draining 10 from this system into the drain. I lightly dose the 265 so that should be enough for the frags in this system and will just increase the dosing in the 265 as needed. The tanks are not physically plumbed together but they share the same water, fun concept isn't it :) This way we get all the benefits of a single large system but are able to isolate one or the other if need be. I have a retractable garden hose that reaches the sump of the 265 and drains into the bottom frag tank.
Last night I put the first frag in the tank, an ORA Green Digitata. I want to let that one sit for a few days just to make sure everything looks ok before I move everything else over. As of last night and this morning it had great polyp extension and was looking almost better than it was on the rack in the display. If everything goes well then by the end of the week I will have all the other frags moved over.
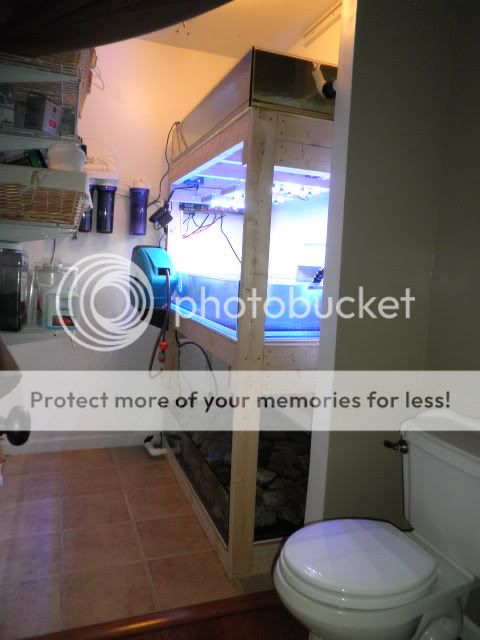
As you can see from the pictures this system is located in my former laundry room (which is on the backside of my powder room). The washer is upstairs now and that spot was begging for something fish related and with the washer drain right behind the tank it is a pretty perfect spot. I don't have any build pictures but as you can see from the pictures it is basically 2x4's framed together. Each tank is sitting on a 1" sheet of styrofoam. Because of the tight space I was having a hard time getting the entire system in the picture. Excuse the messy wires on the wall, I took the pictures before I finished wire tying them all out of the way. The plumbing isn't very easy to see from the pictures but the pump is located on the left bottom and pumps up to the top tank. It drains on the right side from the top tank into the right side of the middle tank. The middle tank then drains on the left side to the left side of the bottom tank where it is then pumped back up to the top tank.
Here is the full system
Middle Tank
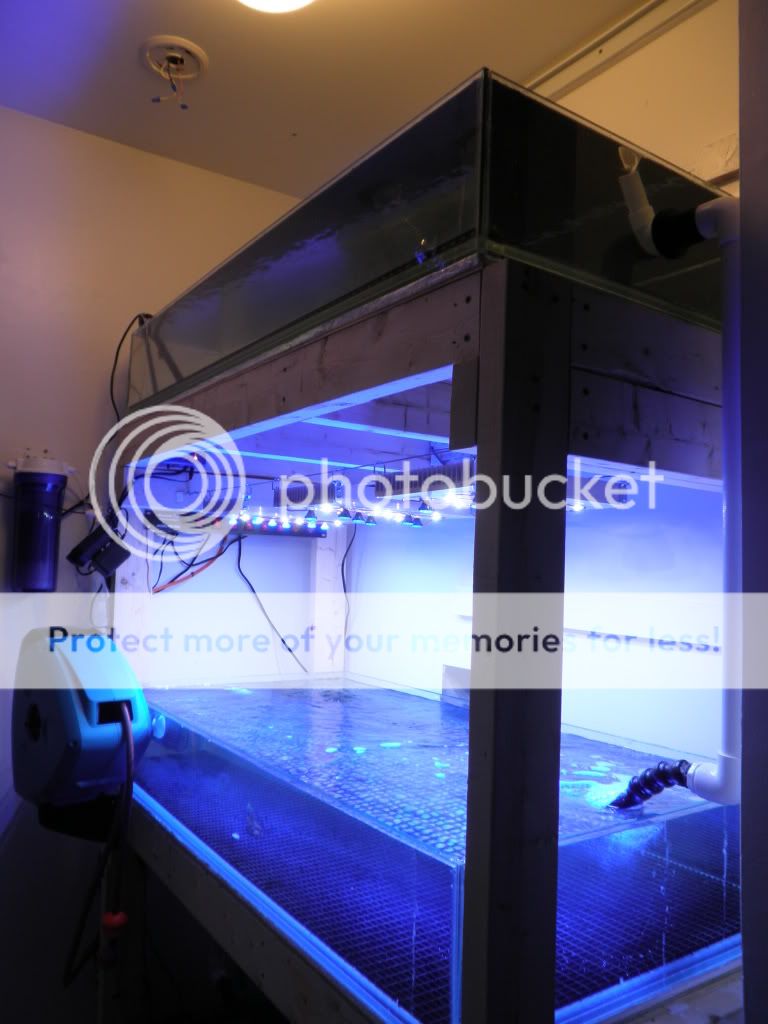
Middle and Top tank
Middle and Bottom Tank
Closer shot of LEDs

The heat sinks are strung on steel rope so I can slide them around if I need to get more or less light somewhere. I also have quick disconnects on my drivers so that I can troubleshoot individual drivers or arrays if need be.
We had a very small space to work with where we wanted to fit the frag tanks so we decided to go much more unconventional and build vertically. Instead of fitting 1 tank in the space we managed to squeeze in 3. The tanks are stacked on top of each other and are all plumbed together and are sumpless. There is no skimmer or any filtration on the tanks, we will be relying on daily water changes to maintain the water quality. 10 gallon water changes a day should be enough to keep the water parameters stable and weekly siphoning for any detritus. Time will tell if the system will work like this or if it will need to tweaked some. At the moment the bottom tank has about 75 lbs of live rock in it that we got in a trade so that should also help with the filtration for the time being. We do not plan on putting any fish in this system so I think just the water changes will be enough.
Currently the middle tank is the only one that is completely setup. It has a Vortech MP20 on the opposite side from the return, black eggcrate for the frags and 3 12"x8" heatsinks with 12 LEDs each for a total of 36: 18 Cree Blues and 18 Rebel Luxeon whites. These LEDs are not dimmable like our display but are the same LEDs. We currently have 60 degree optics on just the blues.
We do a 10 gallon water change on our 265 gallon everyday and now instead of putting that water into the toilet I will be putting that water into this system and draining 10 from this system into the drain. I lightly dose the 265 so that should be enough for the frags in this system and will just increase the dosing in the 265 as needed. The tanks are not physically plumbed together but they share the same water, fun concept isn't it :) This way we get all the benefits of a single large system but are able to isolate one or the other if need be. I have a retractable garden hose that reaches the sump of the 265 and drains into the bottom frag tank.
Last night I put the first frag in the tank, an ORA Green Digitata. I want to let that one sit for a few days just to make sure everything looks ok before I move everything else over. As of last night and this morning it had great polyp extension and was looking almost better than it was on the rack in the display. If everything goes well then by the end of the week I will have all the other frags moved over.
As you can see from the pictures this system is located in my former laundry room (which is on the backside of my powder room). The washer is upstairs now and that spot was begging for something fish related and with the washer drain right behind the tank it is a pretty perfect spot. I don't have any build pictures but as you can see from the pictures it is basically 2x4's framed together. Each tank is sitting on a 1" sheet of styrofoam. Because of the tight space I was having a hard time getting the entire system in the picture. Excuse the messy wires on the wall, I took the pictures before I finished wire tying them all out of the way. The plumbing isn't very easy to see from the pictures but the pump is located on the left bottom and pumps up to the top tank. It drains on the right side from the top tank into the right side of the middle tank. The middle tank then drains on the left side to the left side of the bottom tank where it is then pumped back up to the top tank.
Here is the full system
Middle Tank
Middle and Top tank
Middle and Bottom Tank
Closer shot of LEDs
The heat sinks are strung on steel rope so I can slide them around if I need to get more or less light somewhere. I also have quick disconnects on my drivers so that I can troubleshoot individual drivers or arrays if need be.