Aaron's 125g Move/Build - 1st Timer Here!

My clown:
IMG_1438.jpg


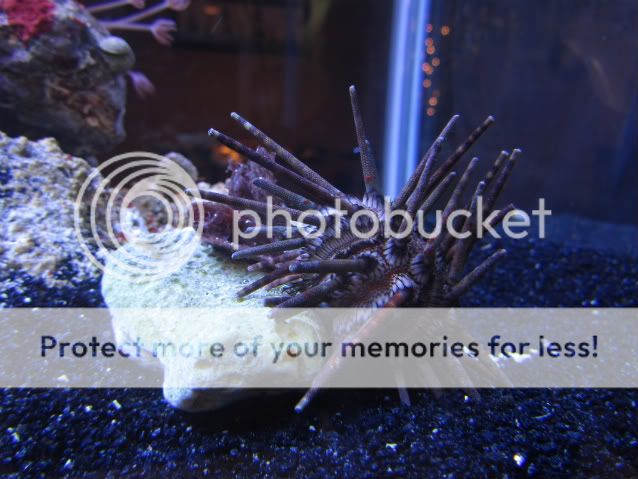
Mr. Urchin as we call him:
IMG_1468.jpg


Sea star:
IMG_1463.jpg


I think these are mushrooms?
IMG_1461.jpg

IMG_1421.jpg


Pretty sure this is the Xenia I've read about:
IMG_1471.jpg


Green grass stuff that grows on purple. Anybody know what this is called?
IMG_1455.jpg


That's all for now! Thanks!
 
WOW! What a setup! And what a game room! I am super jealous. It's threads like these that remind me of why I got into this hobby! :mrgreen:
 
Time for an update after the last week.

I was hit with a nasty case of flatworms. I ordered in some Flatworm Exit and effectively used it this past weekend. After a double day of water changes and plenty of carbon, it looks like 99% of the worms are gone and all other creatures made it through. There still seems to be a few live ones around, so I may have to do another treatment. It's literally just a handful so hopefully the toxins won't be too bad.

Recently my Pencil Urchin decided to eat as much coral and polyps as possible, including a patch of my green star polyps. (The exposed white area below)

IMG_1533.jpg


I've determined that this guy truly isn't reef safe and I'm not sure how the past owner ever got along with him. I just donated the urchin to the LFS so hopefully he'll find a more suitable home. For now he has other urchin friends to hang out with anyway.

My upcoming goals include installing a sump and an algae scrubber and also making room for a protein skimmer down the road. After the first cleaning of the XP3 canister filters last week, I fully realized how dirty and disgusting these things get and I really don't want to deal with them anymore.
 
Looks amazing lizard! I'm jealous! My gsp is still just a frag... all 4 of them! but one is finally growing out onto the rocks pretty quickly.

But that is an amazing colony, and what lighting are you running, and whats the colors of your bulbs, your corals really pop!
 
Hi there,

The lights are not anything special and are simply what came with this setup when I bought it. There's two 48" T5 HO strips, each has a full spectrum daylight and actinic light. The bulbs appear to be a bit old and I'll be starting to replace them one at a time soon. The "pop" you are seeing is probably due to the way I'm taking the pictures. I always use a faster shutter speed than an automatic mode would do, this seems to keep things looking a bit darker but make the colors stand out more. (It still looks great in person though, just a bit brighter overall)
 
Hello,

I thought it was time for some updates. Two weeks ago I installed an overflow, sump, and algae scrubber. The sump is only 10 gallons for now, but I'll hopefully be upgrading to a 55 at some point. It felt great getting rid of the dual XP3 canister filters as they truly lived up to their canister filter reputation of being messy, dirty, and hard to maintain. I love the new clean look of the aquarium and being able to have the heaters in the sump. Anyways, on to the pictures!

Full behind the scenes shot, I've got plenty of room for a bigger sump!
IMG_2258.jpg


Fresh water on left, salt on right. Very convenient for water changes and top offs. I hope to add a simple float valve to the sump for ato.
IMG_2259.jpg


Overflow in action. I found that a combination of the craft board screen and a 3/8" hose stuck down the overflow works best to keep it quiet.
IMG_2263.jpg


Fairly simple plumbing job:
IMG_2266.jpg


Closeup of Algae Scrubber/Tiny Sump:
IMG_2268.jpg


Full tank shot:
IMG_2278.jpg


Closeup:
IMG_2282.jpg


I've still got a nasty flatworm problem which at this point I hope eventually goes away on its own. Their population seems to be stable and two doses of Flatworm exit didn't do the trick. Please let me know if you see anything I'm doing wrong, or could be doing better! My parameters are all great and knock on wood everything seems quite healthy!
 
I really like the set up, Aaron. Really nice for someone relatively new, I wish my first tank was as neatly done and well thought out.
With all the room you have, I'd recommend adding a refugium in there!
 
Thanks for the great comments everyone! I was definetly blessed having the extra space in the basement. Adding a larger sump/fuge is near the top of my list of things to do. I'd like to fit a 55 gallon down there, but it won't fit without removing the center brace - which would require way too much risk and work. Doing two smaller connected tanks may be the best option.
 
Time for a bit of an update... I still have a flatworm problem after 4 treatments and I've decided to declare all out war on them! :helm2: I've figured out that most of them were hiding in my sand bed, which never gets fully stirred up when I do a flatworm exit treatment. I've been working on sucking out my sand over the past few weeks with my regular water changes and I'm almost there! I also suck out as many flatworms as I can see every few days which seems to be working a bit. This weekend I'll hopefully do my first post-sand removal treatment followed by another one a week later. If all goes well and I am flatworm free a month later, I'll add the sand back in. Now for a few pictures for your enjoyment!

The Enemy:
IMG_2398.jpg


Most of the sand is gone. I'll be able to get the rest with the next water change.
IMG_2411.jpg


All sand is split up into half gallon portions and rinsed out in a 5 gallon bucket until the water runs clear. It's then stored in a tub. I plan to add RO water to this tub along with a canister filter and give it a really good final stirring before slowly adding it back to the tank.
IMG_2416.jpg


As I came upstairs with the camera in my hand, I caught the cat just chillin' in the lunch box. This was not staged, my cat just does weird stuff like this:
IMG_2422.jpg


Hopefully I'll be able to post a success story soon! Once I get rid of the little flatworm jerks, I'll be adding more rock and finally some new corals!!
 
Back
Top