Buddy's180 Reef Upgrade

Its a kreg jig, can be purchased at most hardware stores for around $18
thanks after looking at yours and going back to work on my i cracked to boards and it didnt look very good. the countersink didnt do what it was suppose to and look crappy. thanks again. off the the hardware store. lol
 
Sometimes it helps to drill the boards out with a drill bit before running a screw through it. Drill the hole with a bit (use a bit thats slightly smaller then the screw so it will still bite, and don't drill all the way through), then counter sink it, and then screw it. It will help quite a bit :)
 
most countersink bits will also drill a pilot hole for the screw to prevent it from splitting. Theres many factors that can cause splitting tough. Number one being screw threads. Use course screws for softer woods and finer threads for harder woods. Also avoid knots; this will most certainly split your wood if you try to drive a screw through one. The kreg jig also makes its own screws that are much better than normal. You can buy them in regular stainless or outdoor (blue) which are rust resistant which is obviously what you will want dealing with salt. You will need a square drill bit if you go with the kreg screws; pay close attention to material width and screw length needed. The back of the box will tell you which ones you need and the kreg jig instructions will tell you how to properly set your jig. You will also need a clamp to hold it in place; I had a c- clamp already handy for the project.
 
It looks like I will be going with a black colored back ground thanks to your recommendations. I think blue would get lost with the actinic lights on and the fiance didn'tt like the idea of purple.

Here is the update I mentioned last week, received my kalk stirrer and dosing pump in. I still need the plumbing lines, sump, gfo & carbon reactors, and then will begin ordering the lights. I will be doing DIY led again like I did with the 75 but will have to build it in sections. I plan to transfer the critters from the 75 over including the rock. Once transferred; I will sell the 75 gallon system to fund the remaining sections of lights.

Here is a photo of the equipment thus far excluding the heater and mp40's currently in use on the 75. Will be ordering gfo/carbon canisters this weekend and the tanks or glass to build the sump.
 
Come on get this thing wet already lol jk looking good so far take your time.

Haha, trying my hardest to not break the bank. Both vehicles have gone through the shop since the start of this build. The jeep for a new transfer case and the bmw is now in the shop for all wheels to be replaced and aligned. Hydroplaned it back in May :[

Told state farm they were horrible neighbors today on the phone because they're taking their sweet time with the claims department.
 
Oh man tires I don't even want to think about that. Lol insurance companies suck plain a simple.... To get your money they are fast but when you need them they take their sweet time.
 
You gota be running low profiles on the beamer. So, yeah, those probably hurt quite a bit. If you lived closer to me I could get you ones that were used for about 1,000 miles for 60 mounted and balanced. How bad was the damage from it? Any body work needed? (I'm assuming you hit something, hence the insurance claim)
 
all 4 wheels (runflats of course and low profiled) front skid plate and front left control arm. $3800 in damage sadly. No body damage though so it wont go against the carfax according to the body shop.
 
Holy crap....... just, Holy Crap. Ever think about switching to a 2000 Honda Civic? That amount of work on a Honda Civic is probably about 3300$ less :mrgreen:
 
Haha! The fiance works for BMW, its all she will ever drive; I tried to talk her into a less expensive vehicle but theres no use and I try not to debate it knowing it cost me $10 every time I rev my jeeps engine ;)
 
Electrical is ran and in place, will upload photos tomorrow :)

Going to the pet store Tuesday for the sump aquariums. I will be using a 40 gallon breeder to house most of the equipment but will also have a 20 gallon refuge and a 10 (or bigger depending on what the store has) frag tank. I enjoy buying, farming, and trading frags but do not want them in my display tank so a frag tank under the stand is a must. This is where all of that space below the tank will come in handy! Not sure on a design yet but I figure I will have to elevate and stagger the refuge and frag tanks for safety (preventing overflows) as well as room but it will all work out in the end.

My electrical and Co2 tank will be kept in one bookcase cabinet; the food, chemicals, and other drystock will be in the other.
 
To be honest, there isnt much excitement with a gfci plug in the wall so I wont bore you with photos. To sum it up, we ran about 80 foot of 12-2 wire, installed a separate 20amp breaker for the tank alone and a 4 outlet gfci plug at the wall. This will ensure the tank will have plenty of juice without pulling from the rest of the living rooms electrical.

On to the sump and plumbing: I had some time to kill yesterday before work so I went ahead and ventured to my LFS for the sump tanks. I purchased 1x 40g breeder that will house majority of my equipment and also 2x 20g longs. Problem is, the 40gallon is not wanting to maneuver into place under the stand so I will have to cut a door from the side for it to slide in. A little aggravating but it is what it is. In the future, I guess it will make it easier to get under the tank and work on the sump if need be. So far, this is the design I came up with


Tell me what you guys think, will this work? I originally figured to have one of the drains run through the frag/fuge setup but the thought of the power going out was a grey area... I would hate to flood my living room ruining the hardwood floors. I assumed it would serve better to have it fed from the return pump instead. The only things the image doesn't show are the ball valves that will be installed throughout to optimize flow and drain. I will use filter socks in this build (as seen to the left of the skimmer); something I did not use with the 75. If anything, it will add to the filtration but in the long run may not be needed since I will be over skimming with the vertex in-280. I will also have live rock in the sump following the skimmer. In the end, the tank will have a large population of shoaling fish so an open look is something I'm going for; therefore the extra rock will be housed below the tank.

Here in a bit, I will make a trip to the hardware store for the background paint and glass panels which will be used for the baffles in the sump. I will also look into a piano hinge for the door that will be created on the side for sump installment and access.
 
Have a big update coming later this evening. Disregard that last post with what the sump setup would have been.... Turns out, there was not enough room so I had to return/exchange some things. Still used a 40g breeder for the sump and the fuge is a 20gallon high. Will be gluing everything together this afternoon and posting the updated photos. The photos will include the new side door I made, the pvc plumbing, sump with installed baffles, and the new aquarium background. To be continued :)
 
Didn't expect the plumbing to take all day :[

Heres the photos as promised.

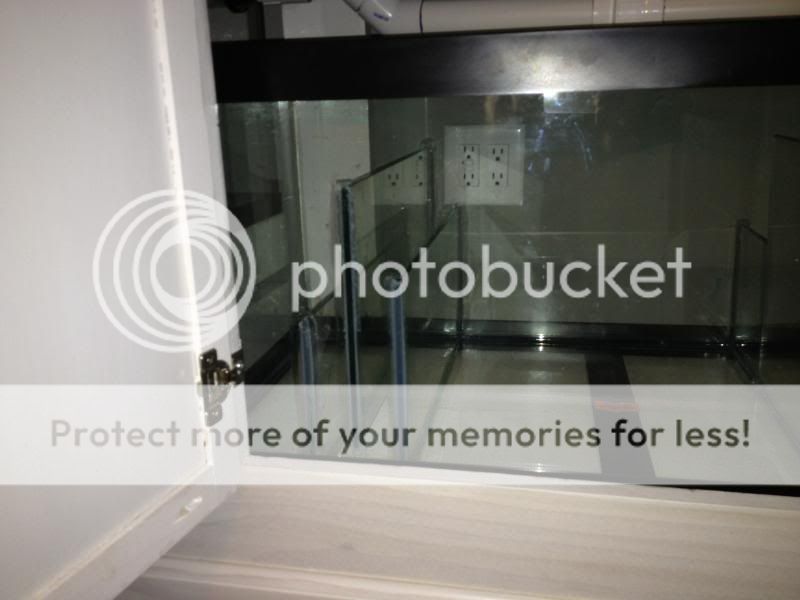
Painted background, stole monkiboys plasti dip idea. Unlike his fancy self, I like it :)


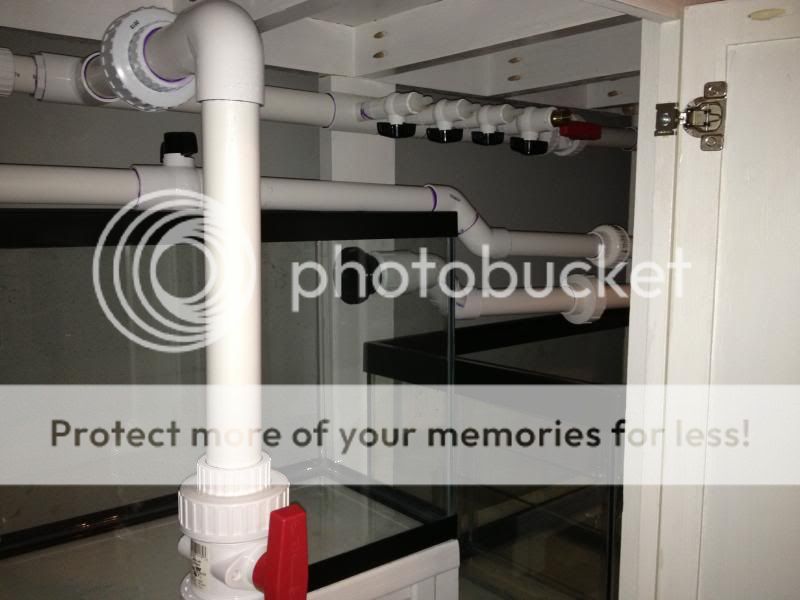
And here is the sump/fuge with plumbing. Below is the 20gallon high that will be used for the fuge. The left overflow is T'd off to have 2 separate exits, one from the fuge and one from the DT.


You can see the drains here as well. Also you'll notice the return; I have 4 sections that will feed gfo, carbon, calcium reactor, and the last one is for water changes.
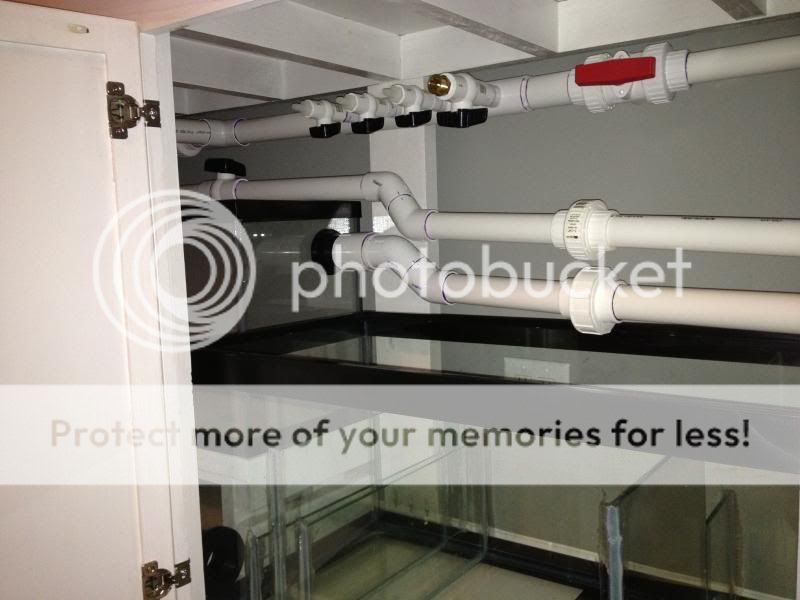

the drains to sump


the first chamber on the right is where the drains run. They will then spill over the frontside of that section into my 5 gallon frag area. I will hang a kessil pendant over this when the time is right and frags are in it. Water then flows over the backside into the skimmer area


skimmer section and bubble trap before return


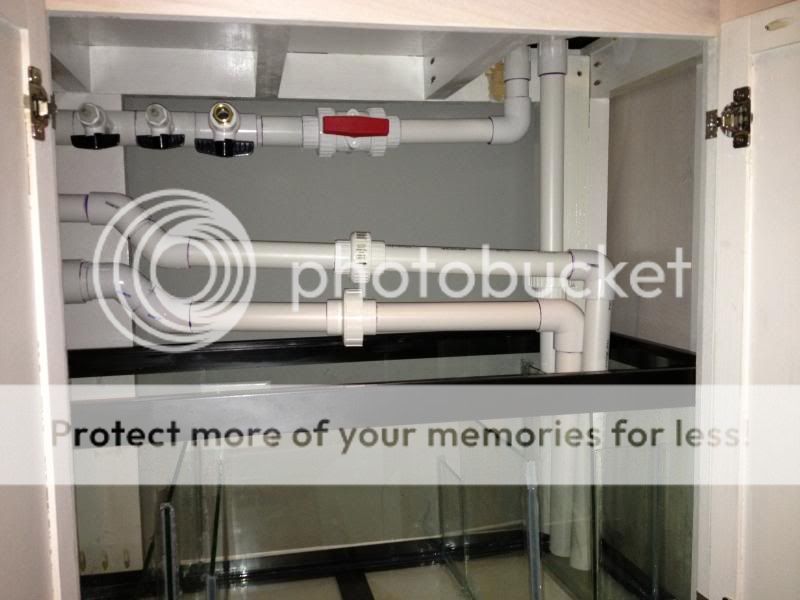
feeds again with ball valves


and "full under tank shot" I guess is the best thing to call this haha


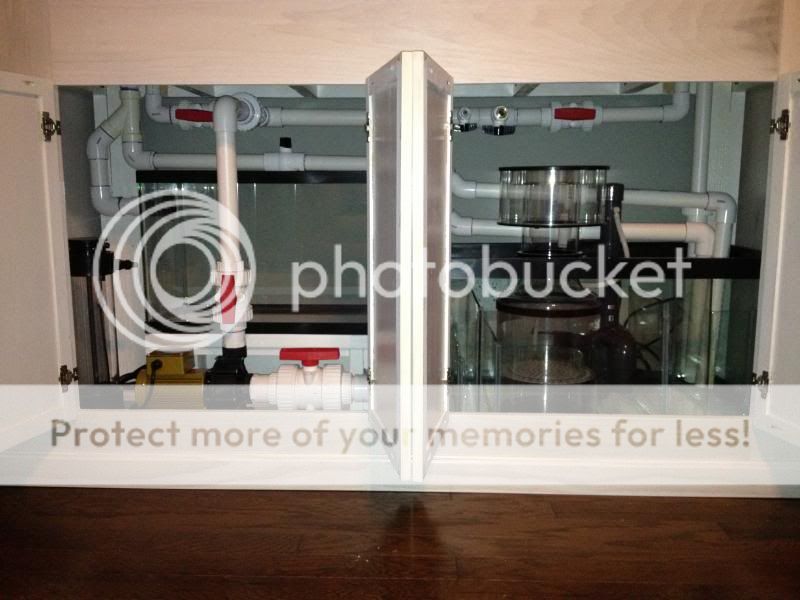
the remaining equipment will be set up in the left and right side cabinets. One will hold my ATO and supplies while they other will hold the calcium reactor, tank, and monitors/electrical
 
Looks great... The plumbing came out great, it seems that it should take so long but it does. Yesterday I spend almost 6 hours swapping out my old sump/fuge setup for the new one I built and re-doing some of the plumbing
 
Thanks; wish the primer wasnt purple though. I hate that I can see it but thats me being a little ocd. I will put an order in soon for the gfo and carbon reactors. Afterwards this thing will be ready for water. Need to look into locating a temporary light fixture still so I can transfer everything from the 75g and sell it to fund the permanent lighting that will go over the tank.
 
Back
Top