phastroh
Do Not Listen To Me!!!
This is just a guide for anyone who wants to run the RO/DI line from one side of their house to the other and keep it neat and clean looking. I will be adding to final steps tonight but have most of it here now.
Just like many of you out there I was sick of carrying bottles every 4 days to fill up my Auto Top Off tank. Time between filling up and the amount of bottles will vary depending on various things but one to me is one too many at this point.
So here is what I purchased to do the job. You actual supply list may vary depending on what you have available and what you will need from the list.
60 feet of RO water line. (1/4 inch)
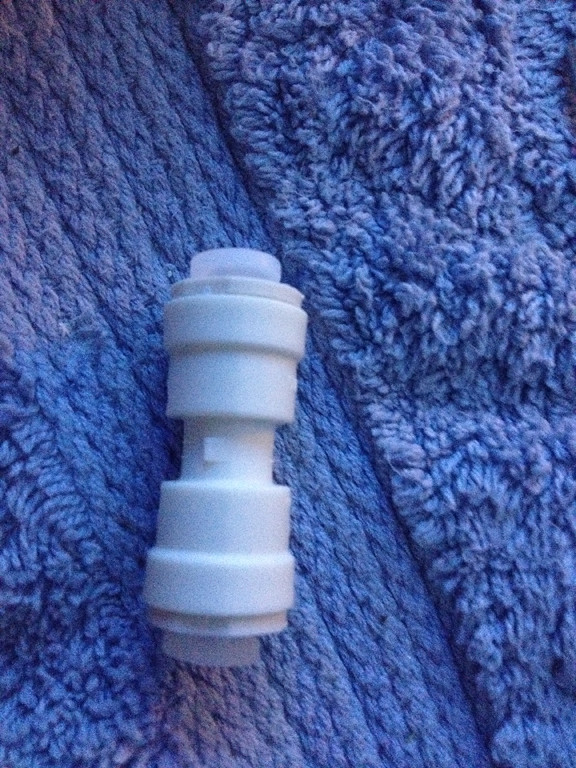
2 1/4 Inch RO water connecters
1 1/4 RO Water Valves(open and closes the water line for use)
2 Self tightening electric boxes
2 Cable Line Box Covers(orange Boxes in pix)
1 Super Glue Gel
1 Exacto Blade Knife
1 Wire pulling/fishing tool
Before you start I suggest you make sure you can drop the water lines where you want to have them exit in the wall. Once that is determined and you know or think it will work it is time for step one.
STEP 1) Using a level and a flat drill bit I marked and drilled the four corners of the wall plate hole. I then used a hand drywall saw to cut out the perfect squares for these units to rest inside.
STEP 2) We went up in the attic and found the 2 places we needed to drop the RO Water line down into the wall. Now this part of the job I did not take any photos because it was too hard to do that in an attic. You can stand in mine but the gymnastics like moves needed to drill one of the holes will not help you at all.
After you drill the headers you can use a flashlight downstairs to try to see the light where you made holes for the orange boxes.
In my case I already new about the cross members so I knew seeing that light was not happening. Lucking I had electric lines installed at one location next the where I was installing the water lines so I followed the already drilled holes.
Once the lines are down and out of the holes you made for the orange boxes, make sure they are secure and out of the way. I had to lay mine in the back of the walk-in attic so they were not kicked or cut by accident. You will have a big problem then. The water lines are thick but not indestructible.
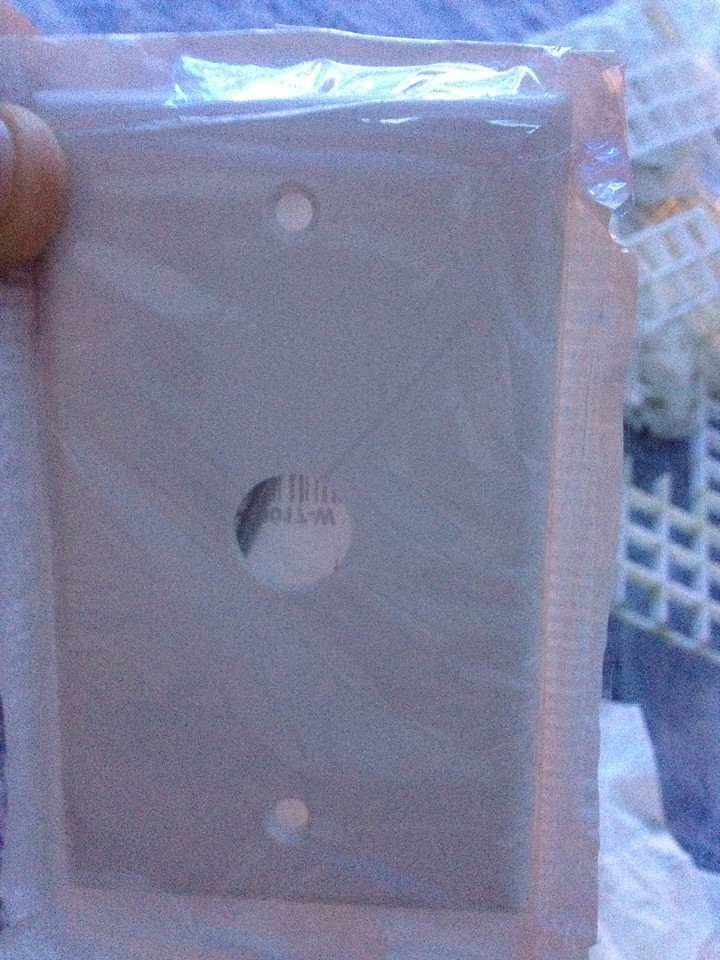
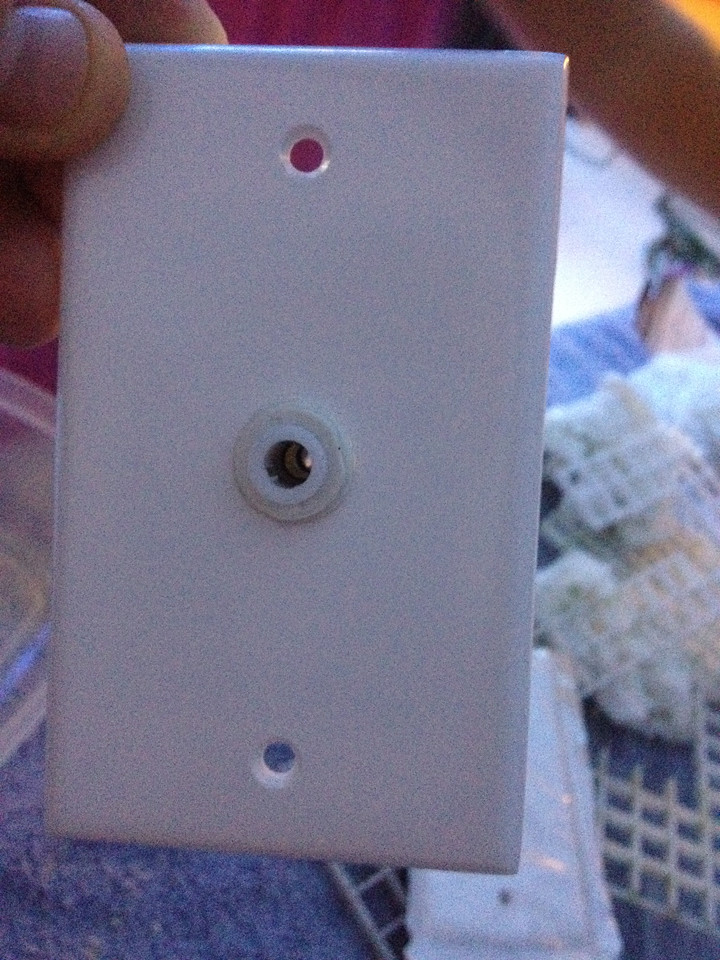
STEP 3) Take you wall plate and use the exacto blade to lightly carve the hole bigger to allow the 1/4 inch connectors to tightly fit in. You just want the ends to stick out like in the photo.
STEP 4) Using the Super Glue Gel put a nice bead around both sides of the wall plate and try to be neat. You can use a small corner of cardboard to smooth it around in down inside.
When this dries it will hold the water connector easily. Note though: Do not going yanking on this like it is all one piece. The glue will hold it in place well but when removing and inserting the lines, just remove the 2 screws that hold the plate and remove the lines by holding the connector. A small job to save you from breaking it.
I was unable to locate a plate specifically for this use so that is why I made it this way and it works as needed and looks great. It just needs to use with some form of care.
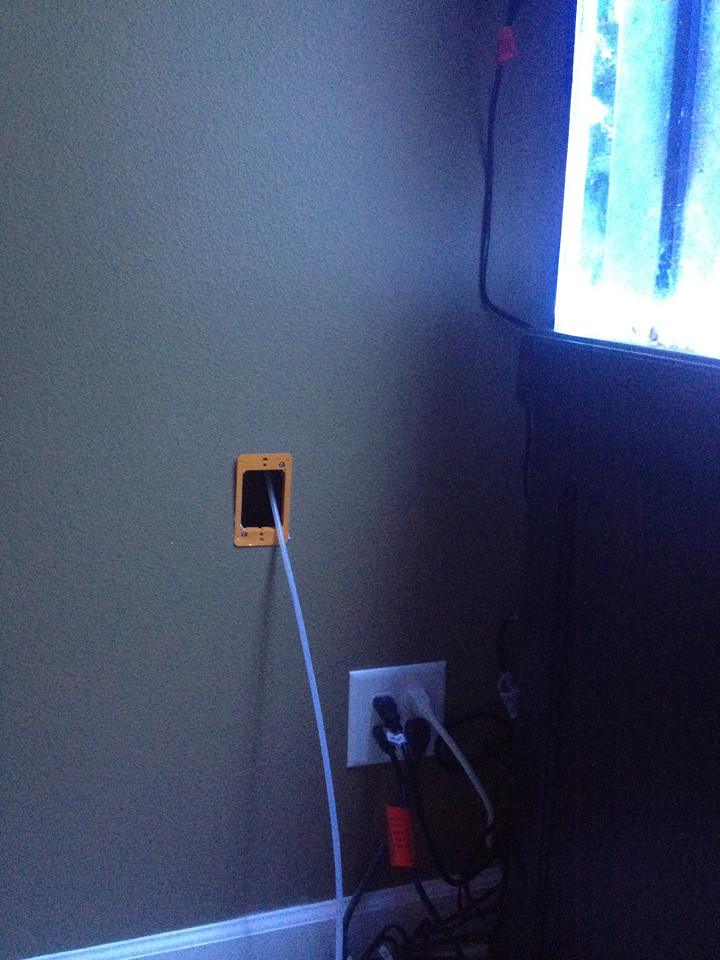
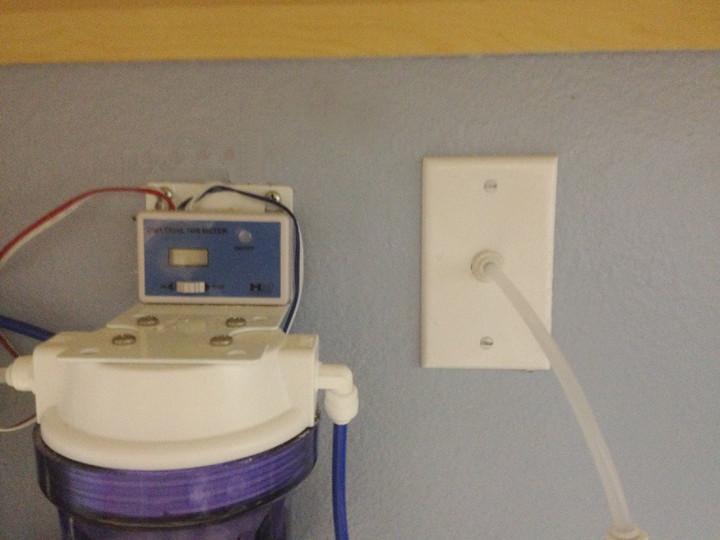
STEP 5) Connect the water lines on both side of the 1/4 Water Connector and screw the wall plate on.
STEP 6) Turn all you water back on and make sure it all is working.
Just few other notes to consider.
1 - Make sure when you are connecting the water lines that they are inserted properly and far enough. You do not want a leak in the wall you can't see.
2 - After you run the line initially, connect the water line to your system and make sure it makes it out the other side into a bucket. Then cut the water supply to the unit and let the water pressure out of the system by opening the line. This saves you water spills like the small one I found. It seems to save whatever water is in the last section coming down from the attic from back pressure and can come out when you do not want it to.
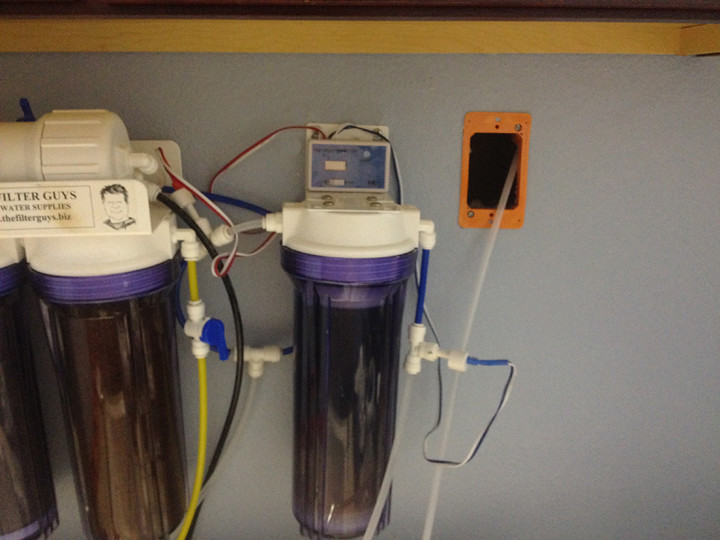
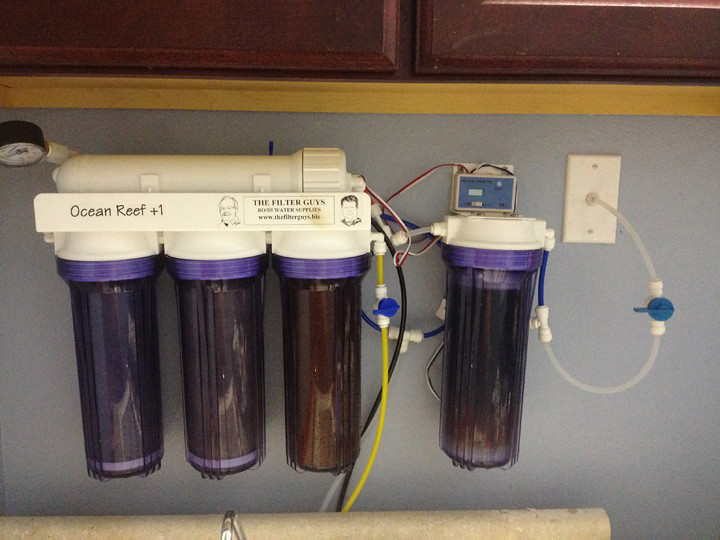
3 - Be sure like me and install a control valve on the side before it first enters the wall by the RO/DI system and of course one on the exit side where you will be controlling the water.
Doing this will allow you to cut the water running in your walls and attic in case of an emergency. If you do not install the first one and there is a problem the only way to stop the flow during a leak is to pull the hose directly out of the system and then you have to shut the water coming onto the system as well or that will also flood out.
You can also use the first valve in conjunction with the second outlet valve all the time so that you have to open both to use the system. THis way when you aren't home and for any reason there is a leak due to a leaky second valve or if a rat chews the line you will only leak what is in the RO/DI line and not however how much until your ceiling falls in.
I hope you enjoyed this so far and I will post the final photos tonight.
Wall-Plate-New by Phastroh1, on Flickr
4 In-Line by Phastroh1, on Flickr
Tank Wall by Phastroh1, on Flickr

System Wall by Phastroh1, on Flickr
TDS Wall Not Done by Phastroh1, on Flickr

4 by Phastroh1, on Flickr
Wall-Plate by Phastroh1, on Flickr
TDS Wall by Phastroh1, on Flickr
Full System by Phastroh1, on Flickr
Just like many of you out there I was sick of carrying bottles every 4 days to fill up my Auto Top Off tank. Time between filling up and the amount of bottles will vary depending on various things but one to me is one too many at this point.
So here is what I purchased to do the job. You actual supply list may vary depending on what you have available and what you will need from the list.
60 feet of RO water line. (1/4 inch)
2 1/4 Inch RO water connecters
1 1/4 RO Water Valves(open and closes the water line for use)
2 Self tightening electric boxes
2 Cable Line Box Covers(orange Boxes in pix)
1 Super Glue Gel
1 Exacto Blade Knife
1 Wire pulling/fishing tool
Before you start I suggest you make sure you can drop the water lines where you want to have them exit in the wall. Once that is determined and you know or think it will work it is time for step one.
STEP 1) Using a level and a flat drill bit I marked and drilled the four corners of the wall plate hole. I then used a hand drywall saw to cut out the perfect squares for these units to rest inside.
STEP 2) We went up in the attic and found the 2 places we needed to drop the RO Water line down into the wall. Now this part of the job I did not take any photos because it was too hard to do that in an attic. You can stand in mine but the gymnastics like moves needed to drill one of the holes will not help you at all.
After you drill the headers you can use a flashlight downstairs to try to see the light where you made holes for the orange boxes.
In my case I already new about the cross members so I knew seeing that light was not happening. Lucking I had electric lines installed at one location next the where I was installing the water lines so I followed the already drilled holes.
Once the lines are down and out of the holes you made for the orange boxes, make sure they are secure and out of the way. I had to lay mine in the back of the walk-in attic so they were not kicked or cut by accident. You will have a big problem then. The water lines are thick but not indestructible.
STEP 3) Take you wall plate and use the exacto blade to lightly carve the hole bigger to allow the 1/4 inch connectors to tightly fit in. You just want the ends to stick out like in the photo.
STEP 4) Using the Super Glue Gel put a nice bead around both sides of the wall plate and try to be neat. You can use a small corner of cardboard to smooth it around in down inside.
When this dries it will hold the water connector easily. Note though: Do not going yanking on this like it is all one piece. The glue will hold it in place well but when removing and inserting the lines, just remove the 2 screws that hold the plate and remove the lines by holding the connector. A small job to save you from breaking it.
I was unable to locate a plate specifically for this use so that is why I made it this way and it works as needed and looks great. It just needs to use with some form of care.
STEP 5) Connect the water lines on both side of the 1/4 Water Connector and screw the wall plate on.
STEP 6) Turn all you water back on and make sure it all is working.
Just few other notes to consider.
1 - Make sure when you are connecting the water lines that they are inserted properly and far enough. You do not want a leak in the wall you can't see.
2 - After you run the line initially, connect the water line to your system and make sure it makes it out the other side into a bucket. Then cut the water supply to the unit and let the water pressure out of the system by opening the line. This saves you water spills like the small one I found. It seems to save whatever water is in the last section coming down from the attic from back pressure and can come out when you do not want it to.
3 - Be sure like me and install a control valve on the side before it first enters the wall by the RO/DI system and of course one on the exit side where you will be controlling the water.
Doing this will allow you to cut the water running in your walls and attic in case of an emergency. If you do not install the first one and there is a problem the only way to stop the flow during a leak is to pull the hose directly out of the system and then you have to shut the water coming onto the system as well or that will also flood out.
You can also use the first valve in conjunction with the second outlet valve all the time so that you have to open both to use the system. THis way when you aren't home and for any reason there is a leak due to a leaky second valve or if a rat chews the line you will only leak what is in the RO/DI line and not however how much until your ceiling falls in.
I hope you enjoyed this so far and I will post the final photos tonight.
Wall-Plate-New by Phastroh1, on Flickr
4 In-Line by Phastroh1, on Flickr
Tank Wall by Phastroh1, on Flickr
System Wall by Phastroh1, on Flickr
TDS Wall Not Done by Phastroh1, on Flickr
4 by Phastroh1, on Flickr
Wall-Plate by Phastroh1, on Flickr
TDS Wall by Phastroh1, on Flickr
Full System by Phastroh1, on Flickr