Refugium Construction

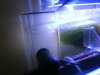
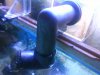
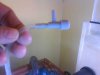
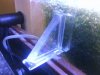
If your fuge is going under the tank and your tank is not drilled, you will need one overflow box and one return pump.

Biff, I was discussing the option of an overflow box (and with that a pump would be needed) but Ted and lily are talking about a HOB refugium which is a self contained unit and can come with everything if ordered as such.
 
I was going to make my own fuge out of a 10-20g tank but after I looked into everything that I would have to purchase (pump, tubing, overflow box etc) I decided to go with a HOB for now.
 
Ah yeah. HOB fuges are great too. Not as complicated as drilling a tank and setting up a sump, and a great option if you have the space behind the tank.
 
You can put snails crabs or any other cleaner in there you want. I think the theory behind the fuge is that algae can grow in there so it won't grow in your display. Most people that put livestock in their fuge have a larger fuge than a hang on back. If that gets bad, you may just have to clean it manually. Not saying you can't put a snail in there, I just don't know that you will need one.
 
Last edited:
OK, Ted by minimal instructions you meant NO instructions right? :) OK I got mine in the mail today and I am going to need some help. Can you post more pictures so that I see how it is put together?
 
lol i actually said no instructions. Ok ill try to walk you through it. get everything laid out on a table. The skinner tubes are for the intake on the left side of the fuge. the threaded skinner tube goes inside the fuge facing down. Threads through the hole. After the threads are through the hole facing out put on the rubber seal. The seal goes on the outside, wet the seal. You wet it so it doesnt bind when you tighten the the inlet tube. Screw on the inlet tube. you will need to have your hand holding the inside tube to try to keep it straight down. Do not over tighten you can crack the fuge if you over tighten. Once it is snug you will be able to see if the seal is deformed ( pushed out around the in take tube) if it is try again. it can take a couple of tries the idea is you want both inside and out side tubes facing straight down. heres some pic of that part when its on right.
 

Attachments

  • DSC00082.jpeg
    DSC00082.jpeg
    21.4 KB · Views: 233
  • DSC00072.jpeg
    DSC00072.jpeg
    30.9 KB · Views: 225
  • DSC00077.jpeg
    DSC00077.jpeg
    20.2 KB · Views: 243
Ok next step is the outlet tube. Its basical the same as the inlet. The out let tube has the threads on it the seal goes on that part. On the outside of the fuge same as the inlet. Again wet the seal before putting it on. Push threads through the hole and secure with the big nut. Nut goes on the inside. Its a pain in the butt holding onto the nut. What I did was got it going then just held it and turned the outlet tube itself. Dont over tighten. Again inspect the seal for deformation and hav the tube pointing down. There is a elbow that goes on the end of the outlet tube. The elbow should go into the water of your tank about half way. Heres the pics of mine on that part.
 

Attachments

  • DSC00071.jpeg
    DSC00071.jpeg
    38.3 KB · Views: 504
  • DSC00078.jpeg
    DSC00078.jpeg
    22.7 KB · Views: 295
  • DSC00083.jpeg
    DSC00083.jpeg
    37 KB · Views: 258
Ok almost done. Next install the powerhead. In the parts with the power head you will see a intake flang. Its a tube thing that you put on the intake of the pump one side has a strainer. You can put the sponge on this however i didnt i cut the sponge in half and stuffed it into the out let elbow to reduce bubbles going into the tank. Inside the strainer are some circle things (nipples) Put the airline on the center nipple. Thats how the air gets in the skimmer. Oh ya theirs a grey plastic thing. It goes on the other side of the airline. It has a screw in thing that you can use to regulate how much air is being drawn in it also acts as a noise dampener. that goes outside the tank. You dont want it in the water. Heres a few more pics.
 

Attachments

  • DSC00084.jpeg
    DSC00084.jpeg
    21.2 KB · Views: 256
  • DSC00074.jpeg
    DSC00074.jpeg
    17.9 KB · Views: 242
Ok before we get this puppy on the tank we need to get the leveling screws on it. There are a couple of black plastic screws in all the hardware. On the bottom of the fuge you will see where the screw in. Screw them in. The heads of the screws should face the back tank wall. Ok lets get this on the tank. Theres a plastic triangle that goes on the center brace it doesnt lock down so if you put it on it will fall off. While you are getting this on the tank you put it on the weight of the fuge will keep it on while on the tank. Once its on the tank with power head and outlet in the water and the center brace in place level it out with the screws. You want it as level as possible. This will take some fiddling. The idea is if it is level you wont get spill overs and their wont be excess pressure on the tank wall. Once you feel it is level plug in the power head the fuge will fill with water. watch for leaks on your seals if it leaks you will need to take it off empty water out unscrew and reset the ring. Hers a few more pics.
 

Attachments

  • DSC00081.jpeg
    DSC00081.jpeg
    35.4 KB · Views: 253
  • DSC00071.jpeg
    DSC00071.jpeg
    38.3 KB · Views: 253
  • DSC00085.jpeg
    DSC00085.jpeg
    33.5 KB · Views: 261
Ok last part. Put the big rubber o-ring on the collection cup. This will keep the cup from falling into the bubble chamber. You want the bottom of the cup about 1/4 to 1/2 inch into the water. Next the two plastic C things are for the light to sit on above the main part of the fuge. They just sit on top flat side up so light has a base. The only thing i didnt cover is if you want sand or mud in the fuge. I put a little sand with some live rock rubble in mine. I did 1/2 inch but thats up to you. I got mine all setup and then turned it off put in sand let it settle then turned it back on. I also put half the sponge in the outlet. If you use the sponge in any way rember to rinse it weekly that way it wont become bio active which can cause trates. Ok last pics and you should have a working fuge. Oh Ya dont forget to open up the airline so you get bubbles.
 

Attachments

  • DSC00080.jpeg
    DSC00080.jpeg
    28.7 KB · Views: 231
  • DSC00079.jpeg
    DSC00079.jpeg
    29.5 KB · Views: 244
  • DSC00071.jpeg
    DSC00071.jpeg
    38.3 KB · Views: 241
  • DSC00086.jpeg
    DSC00086.jpeg
    31.6 KB · Views: 278
OK,
first I didn't have the air tubing so they are sending it to me. I can still run the pump without the air tubing - it just wont be a skimmer right?

Second - I have the plastic O-ring on the collection cup and it doesn't seem big enough, it falls down to the intake valve.
There is a small screw hole in the side of the skimmer area that looks like a screw should go in it. I do have one screw left over - but none of them will fit in the hole.
Any idea's?
 
Hmm ok. you can use any airline until the new one comes in. Just put a wood airstone on it to muffle the sound. Not sure why the o-ring doesnt work. If it was me i would just go to a hard ware store and get a thicker one. You could even use a few rubber bands anything to keep it in place will be fine. I believe that the hole is a over flow drain just in case the water goes to high in the skimmer. I didnt put anything in mine just left it alone. I didnt use the black light brackets just used the clear ones. Make sure you take all the bubble wrap and the zip ties off of the light fixture. You can run it with out airline for now it will still flow just no skimmer. I always have so much of the stuff laying around. I forget that people arent pack rats like I am with aquarium stuff. I have hob filters I will never use still in a box in my closet. It seems I always need something in the middle of the night and my box of junk can come in real handy. I am off tomorrow so I will check in see if everything is going ok.
 
I am still running my primary skimmer so it won't be a problem without the airline tubing. Thank you for the thought of using more rubberbands. I wonder if they sent me the collection cup for the smaller fuge. Thank you so much for all of the help. I got it up and running last night. Looks great. Even got some sand, LR and chateo in it :)
I will posts pictures soon!
 
Back
Top