Doc's Shark Tank

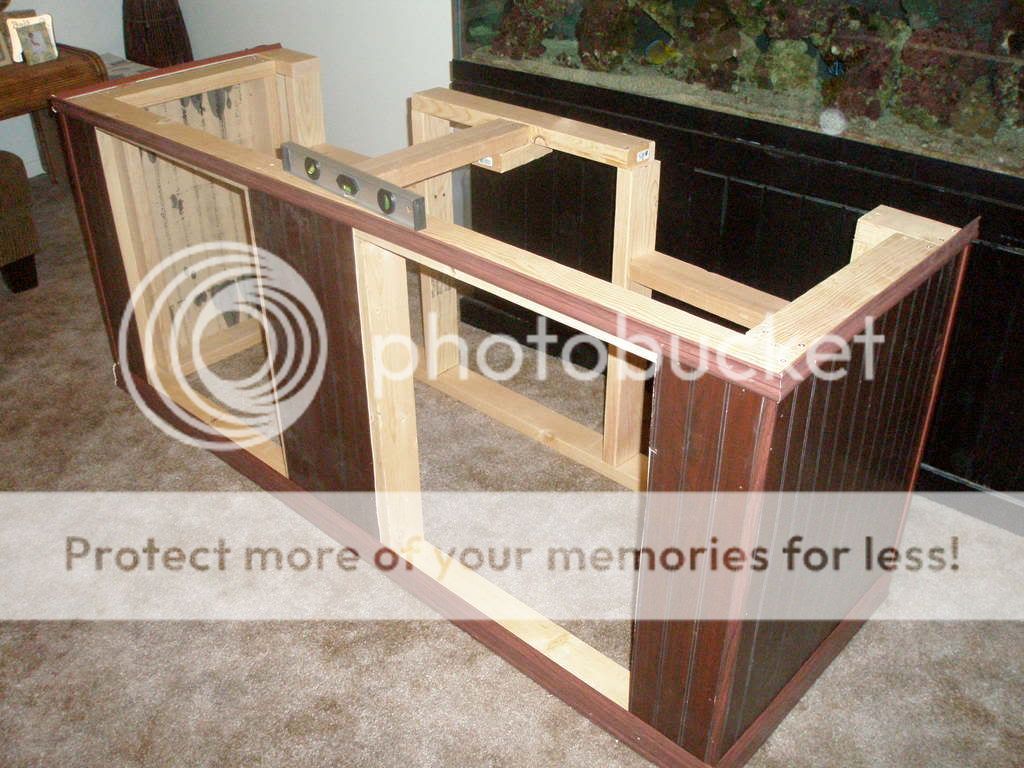
aaaaaarrrrrgh!!!!!!! off by 2 centimeters!!!!!! WHY??? Why must the gods of hardware and carpentry hate me so!!!! Dammit! I f&%king hate DIY projects!!! what the F$%K is wrong with me. Why not shell out the extra $750 for the stand, noooooooooo, I have to try to be F*&king Bob Villa.....:frustrat:

Now then, I feel better. I will get back to my piece of :pooh: stand. I will have to learn to cope with "good enough".

-Doc
 
well, it is as good as it will get. I got sick of trying to measure and remeasure and remove molding and well.... it doesn't matter. So, this is how it turned out:

P5030003.jpg

Here it is, without the doors.

P5030002.jpg

The doors were a problem. I had no idea how to install them. I don't do hinges, I am not a fan of all of the balancing of trying swing a door properly. I decided to put some decoration on the outside....

P5030004.jpg


Doors done. I think I cut the molding correctly to fit the frayed edges of the bead-board I used for the finish work.

I had an moment of genius regarding the doors. Here it is.....

P5030005.jpg


No worries with me trying to put hinges or hang a door. velcro baby!!!

-Doc
 
and..... (drum roll please), the stand is DONE... Ta-DA!!! I cleaned it up a bit and, well, it guess it will have to do. Not too bad for the first try and something like this.


P5030006.jpg


Now, I am ready to fix the baffles in the sump and wait it out til next weekend to add my tank!!!!! YAY! I will have a shark next week....KICK-ASS!!!

-Doc
 
thats a beaut of a stand doc. now will you have a shark next week or a shark tank cycling next week

I will have a shark next week. I am transferring all the sand, rock, water, and livestock from my 125 into the shark tank. I will just be making up the extra water with new salt water, kind like a 50% water change or so. Things will be fine. I am buying my shark next saturday.

-Doc
 
It would be wise to add some plywood to the back sides as bracing against diagonal movement. Just extending it to the first two x fours would be adequate if the plywood is glued and screwed well around the edges. The two front side panels should also be well fastened around all the edges. Other wise it looks great. You've been hiding a good working class skill all these years.
 
Last edited:
Looks great! I used magnets for the doors on my stand, so I can take the doors completely off.

yeah. the velcro works the same way, I take the doors off completely to dig into my sump. I guess all that is left is to test the weight by putting the tank on top of it and filling it with water. If it comes crashing to the floor, the stand wasn't quite strong enough. :Cheers:

-Doc
 
Doc please do this small experiment. Take a card board box and remove the top and bottom. Set the box on its side. Now push on one top edge. It will fold over until it is flat. That is why they put bottoms in tank stands. To brace against what is called racking. The same goes for in the other direction. You should really put some plywood panels on the back sides of the tank. I am sure if there are any carpenters using this site they can confirm what I am saying or suggesting. Even metal workers usually use gussets at corners and intersections on heavy load members to provide better bracing against racking and twisting and to increase the strength of the joint. Ask a carpenter at least before you assume every thing is OK and load up the stand. Or ask Yote, I am sure you probably trust Yotes opinion. I do not know if you get earth quakes where you are, but in Alaska or California that stand would quite likely fold like a deck of cards in an earth quake when fuuly loaded. You definately need a stand that wont sway with a load that large on top of it. With the stand as it presently is, it will sway.
 
Last edited:
Back
Top